Holiday Inspired Play
Santa Snowballs
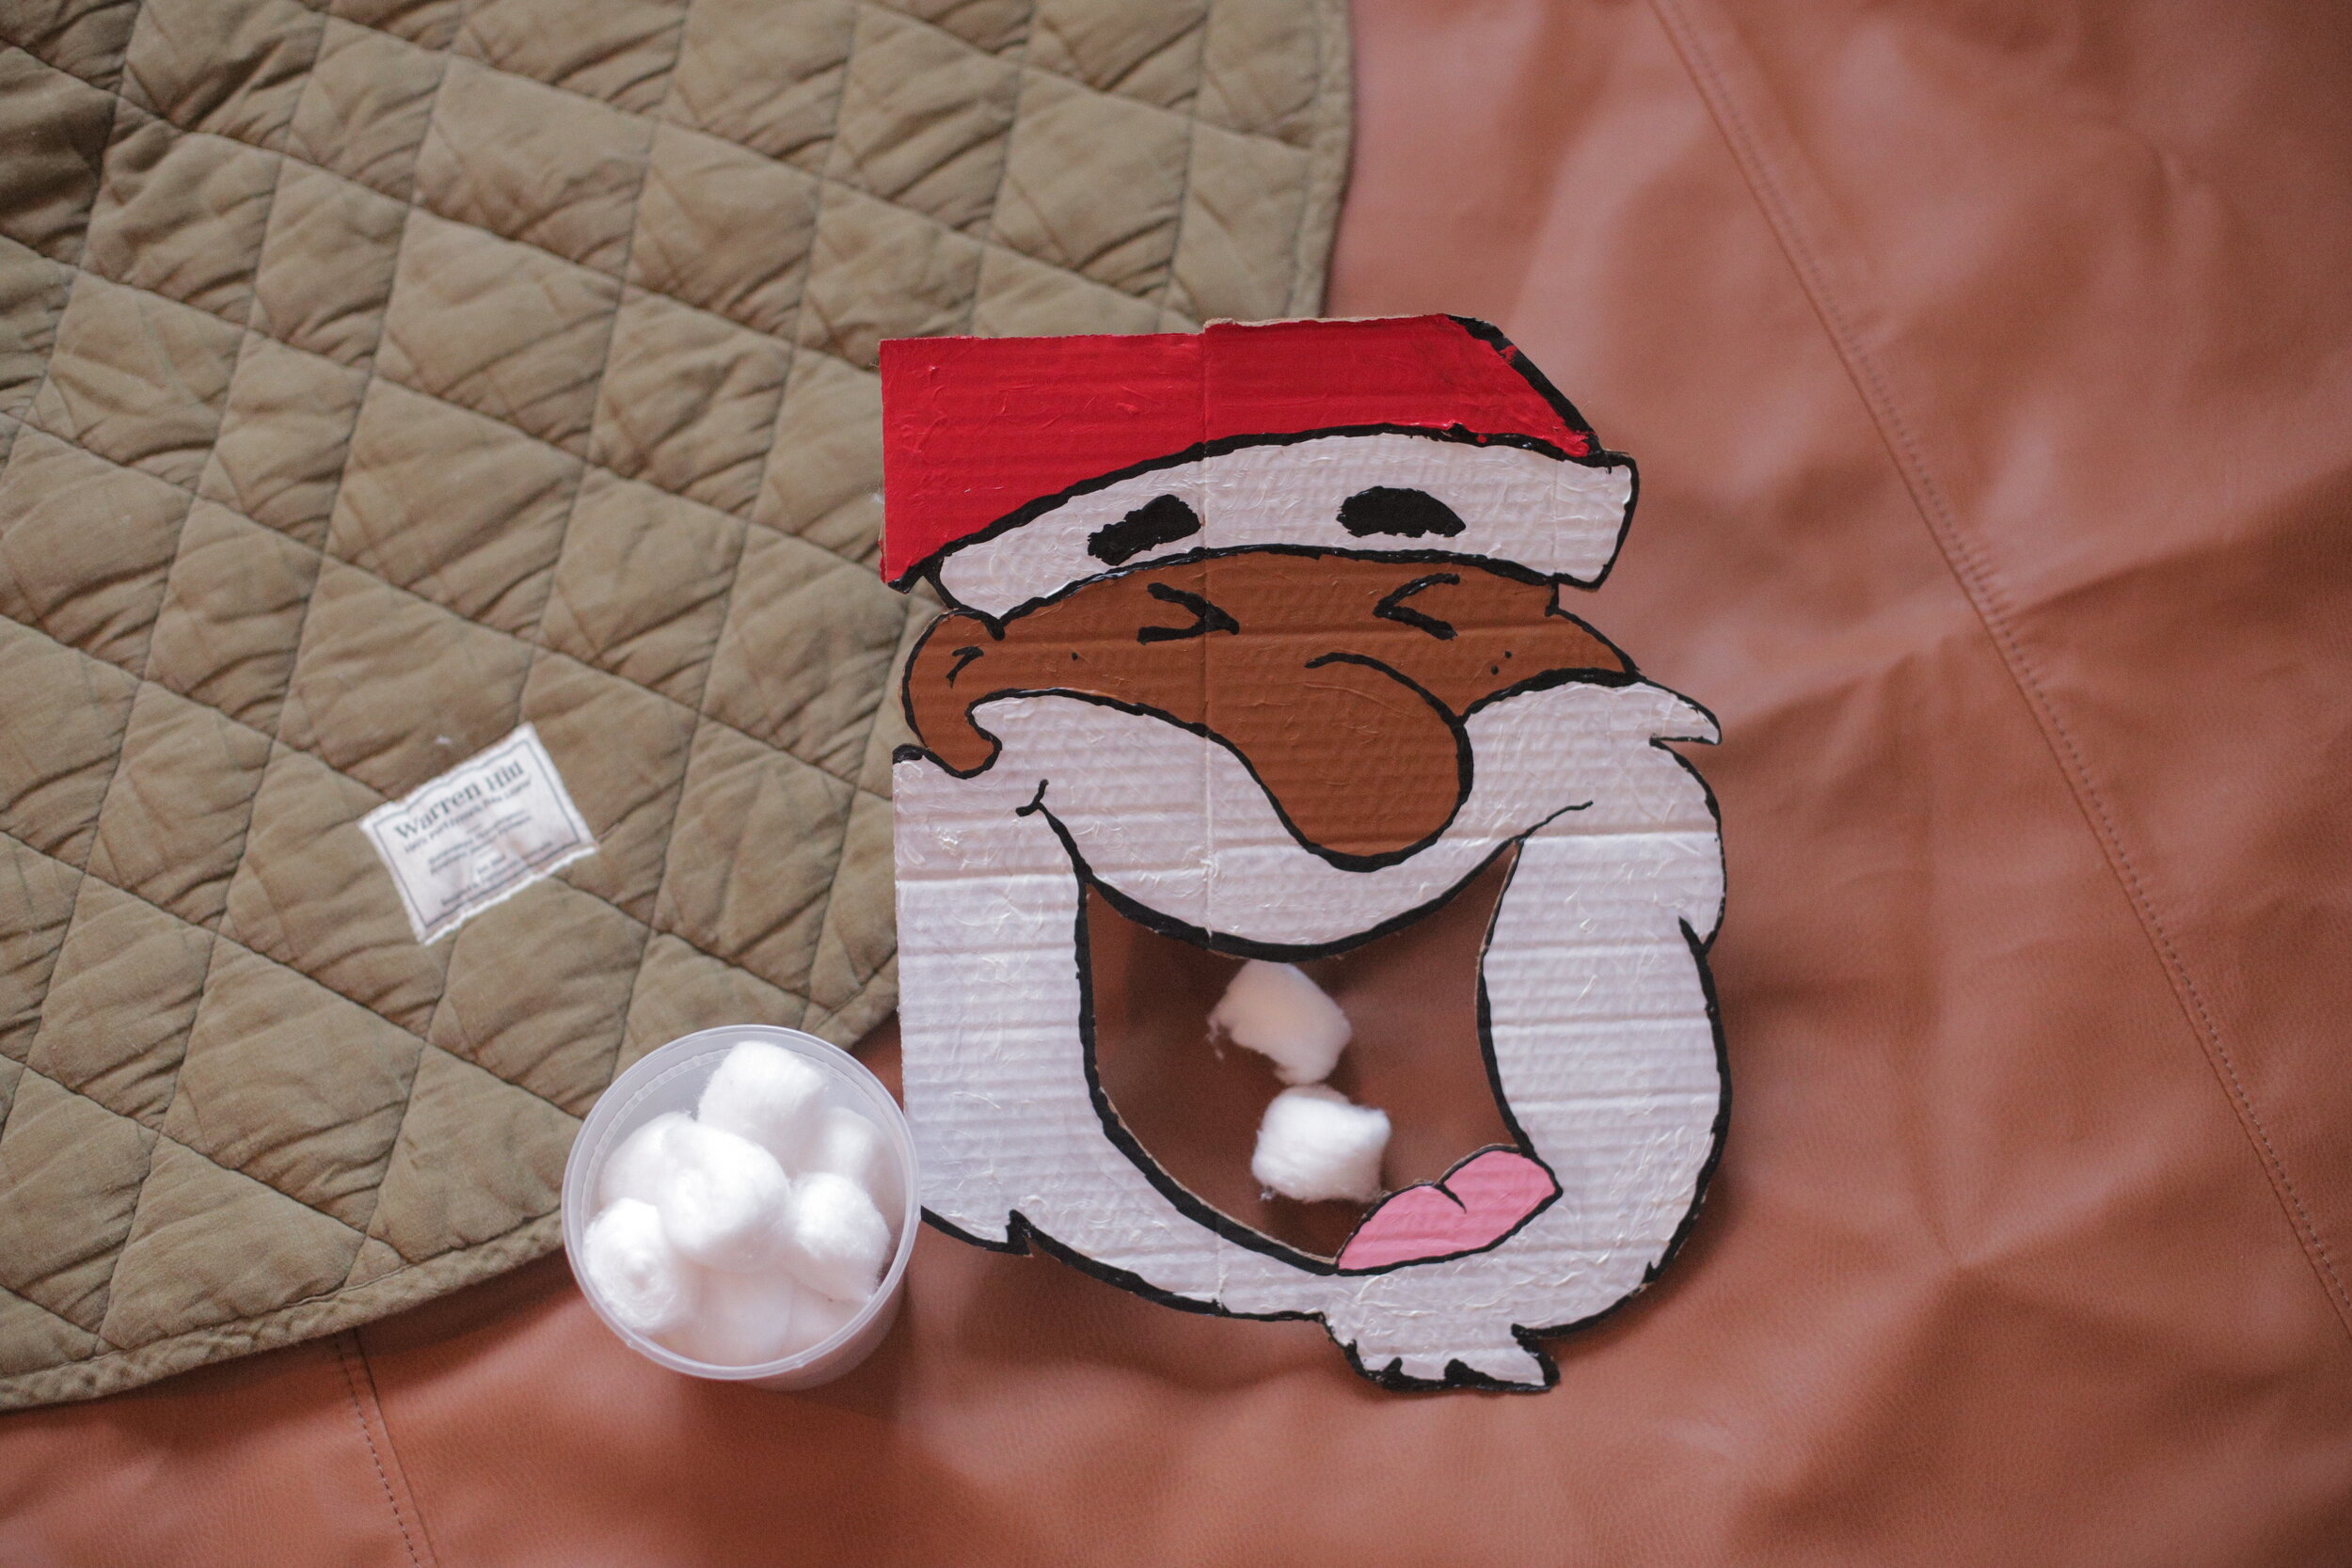
The objective here is to feed Santa the snowballs (jumbo cotton balls) by tossing or placing them in his mouth! This is both an engaging and developmental game for little ones! This was meant to be a snowball toss activity. However, Yumi has not yet taken any interest in tossing or throwing, but she will place the item in the hole! At 18 months, she is very familiar with the concept and knows just what to do when she sees crafts I’ve made for her like this. She enjoys this type of work and the instant gratification it gives. This one is a bit less involved as the hole is larger than her hand and makes for an easier target. Still there is hand-eye coordination work happening and even more so if your little attempts to toss it in!
For this I used a piece of cardboard cut from a box, googled a Santa laughing, drew that on with a pencil, and painted him in with acrylic paint. I then cut the area of the mouth out with a box cutter, fashioned an additional piece of cardboard into the shape of a stand, and taped it to the back. For the snowballs I used jumbo cotton balls we already had. You could use any old regular shoe box and paint to achieve this activity, and Santa could eat cardboard cookies, or anything else you have at home!
Christmas Tree Q-Tip Push

Objective: Push the q-tips through the holes to decorate the Christmas tree!
An awesome, low fuss, fine motor activity for your little one, and with an added festive flair! Yumi, at 18 months continues to engage in this type of work, and it serves as good continued practice for her little fingers. Pushing the q-tip through the small hole requires a great deal of focus, and hand-eye coordination. With the added bonus of it keeping her busy for no less than 20 minutes each and every time! As far as materials go, you’ll need 2 egg cartons (to get a minimum of 5 rows), q-tips, scissors, green paint, a glue gun, and pom pom balls! I first, cut up the egg carton, painted it, then hot glued together what edge pieces of the carton I could, while still keeping its shape. You could, alternatively, try stapling it together, or put this on a large sheet of paper or recycled cardboard and glue it down that way, to better keep the pieces in position! Next, for the q-tips, cut one end off, and then hot glue the pom poms to the other. To make sure the pom pom balls stayed put, I pushed a good enough hole through for the q-tip to go into.
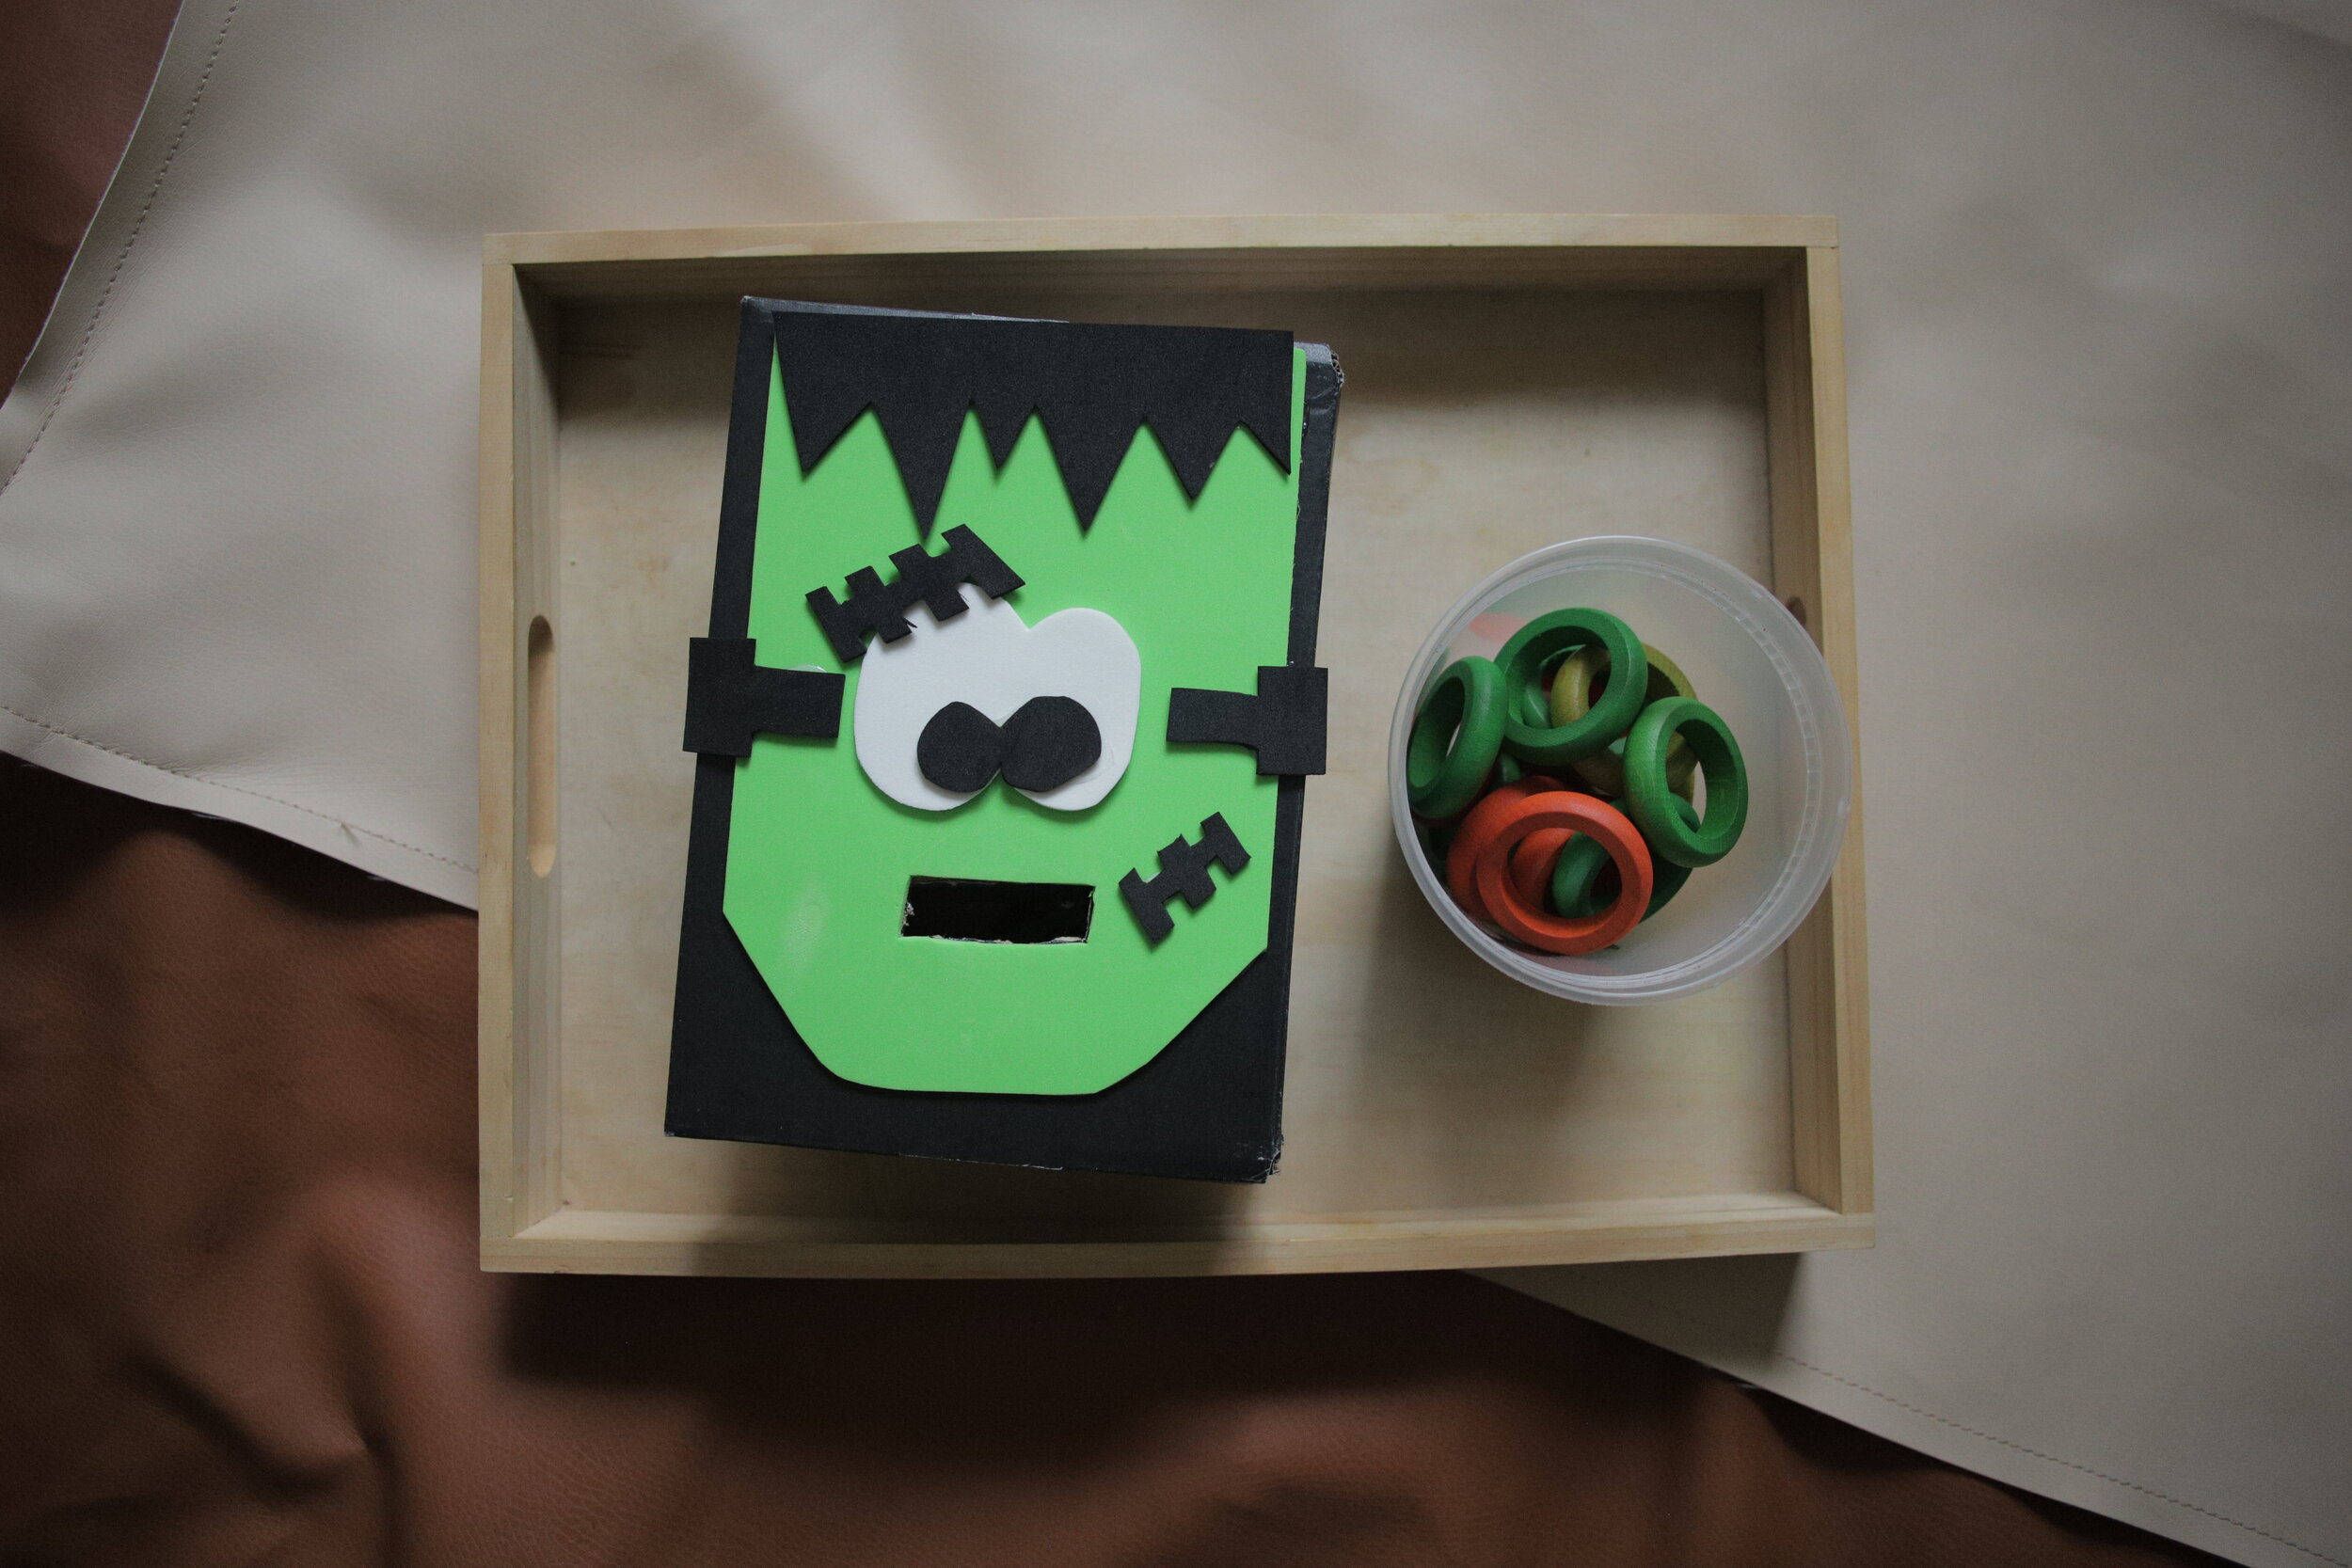
“Feed Me” Frankenstein
Boo Box

Objective: Push the rings through the slot to feed the Frankenstein. Push the pom pom balls through the hole to feed the ghost!
This is a simple activity to help your little one develop hand-eye coordination, and wrist and finger control. Getting them ready for those more refined movements, like holding and writing with a utensil, shoe tying, etc. These boxes offer the same experience as an object permanence box, as they drop the item into the hole and open the box to retrieve it. This allows them to see that the item did not disappear, but instead, is just temporarily out of sight.
Yumi loved these two boxes, and played with them for about 25 minutes, which in my book is a win. To make them, I simply used two of her shoe boxes, some foam sheets I purchased from Walmart, a pair of scissors, and a hot glue gun to ensure the pieces stayed put, if she decided to attempt to pull them off (which she did, of course). The wooden rings used for the Frankenstein box, I purchased from The Wooden Wagon, but can also be found, unpainted, on Amazon.com; and are additionally sold in some major craft stores i.e. Michael’s or Hobby Lobby. That said, there are so many other slender disc like items that can be used alternatively, get creative! The puff balls were the perfect alternative, which I used for what I’m calling the “Boo Box”! They come in different sizes and she was able to experiment with smaller ones that went in easier and the bigger ones that took a little more effort to push through.
Of the two, the Frankenstein box proved to be a little more of a challenge as she struggled a bit when the box was turned a certain way. To up the difficulty level, I would shift and turn the way the box was facing her, which forced her to adjust the way she was holding the ring and practice putting it through the slot horizontally and vertically. These boxes offer good hand-eye coordination, finger isolation, and refined hand/wrist movement practice!